Volkswagen Taos: General information, Body. Welding plastic attachments
Welding crack up to length of 100 mm
Welding crack up to length of 100 mm
– → Rep. gr.52; Repair deformations.
Important
● Both sides of the crack must face each other in relieved condition.
– → Rep. gr.52; Preparing plastic repair.
– Clean repair area with plastic cleaner → Rep. gr.52; Processing instructions – original products.
Painted plastic attachments
– Sand repair area with a commercially available orbital sander -A- and P120 grit sandpaper.
– Blow out sanding residues.
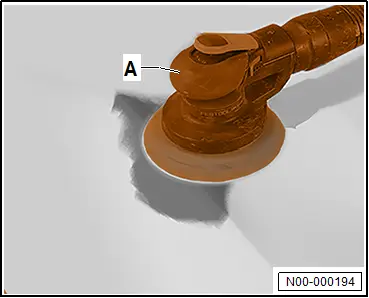
– Clean repair area with plastic cleaner → Rep. gr.52; Processing instructions – original products.
All vehicles (continued)
If the plastic attachment does not have a small thickness:
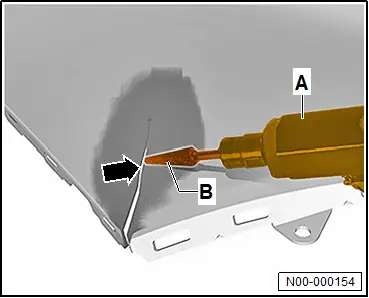
– Use a commercially available conical milling cutter -B- to mill a V-shaped bevel on the inside and outside along the crack -arrow-.
– Blow out milling residues.
– Align crack -arrow- flush.
Continued
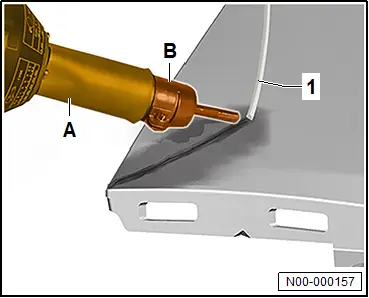
– Insert wedge-shaped welding nozzle -B- into hot air blower -A-.
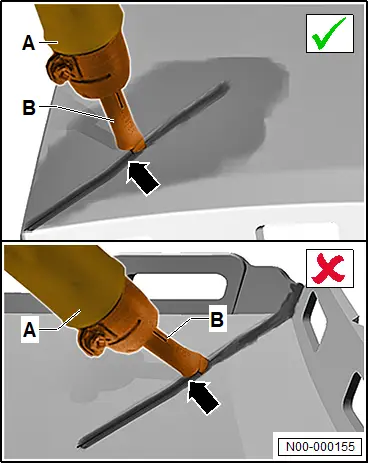
– Use wedge-shaped welding nozzle -B- at welding temperature to spot weld plastic attachment along crack -arrow-.
Important
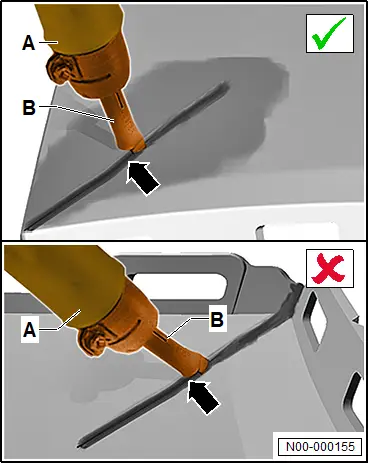
● The contact line of the wedge-shaped welding nozzle -B- must be guided parallel to the surface.
● If the contact line of the wedge-shaped welding nozzle -B- is not guided parallel to the surface, material will be removed.
Note
The first welding pass is carried out without applying material to create a connecting line between the edges of the crack. The connecting line is the basis for the material application.
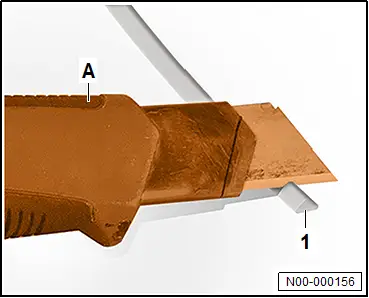
– Use a commercially available knife -A- to bevel end of welding rod -1-.
– Make sure that welding rod -1- is clean and in good condition.
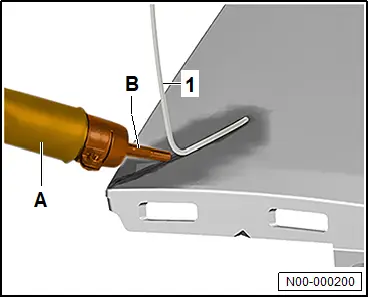
– Insert adapter nozzle for welding -B- into hot air blower -A-.
– Place welding rod -1- with bevelled side at end of crack.
– Move hot air blower -A- in a wagging motion.
– Use hot air blower -A- to heat up welding rod -1- an body attachment until welding rod -1- and body attachment become soft at the same time.
– Push welding rod -1- into area of crack to apply material.
Important
● The pressure on the welding rod -1- must be sufficient such that the welding rod -1- can bond with the body attachment. The welding rod -1- must not deform or break the V-shaped bevel.
– Guide welding rod -1- vertically along the path of the crack.
Important
● Welding rod -1- must be held at an angle of 80º to 90º to the surface.
– Move hot air blower -A- along the crack.
– Select welding speed so that:
♦ the material does not decompose or deform.
♦ the welding rod -1- bonds with the body attachment.
After the crack has been welded:
– Allow body attachment to cool down.
– Separate excess welding rod.
Continued
– Repeat the procedure on the other side of the body attachment.
– Clean repair area with plastic cleaner → Rep. gr.52; Processing instructions – original products.
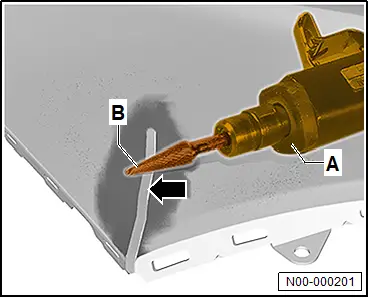
– Use a commercially available conical milling cutter -B- to remove excess material from weld seam -arrow-.
– Blow out sanding residues.
– Clean repair area with plastic cleaner → Rep. gr.52; Processing instructions – original products.
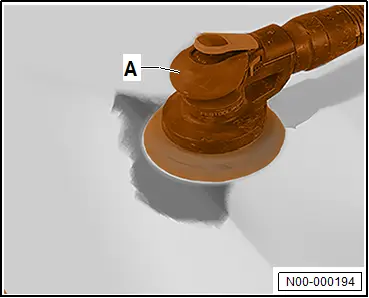
– Sand repair area with a commercially available orbital sander -A- and P120 grit sandpaper.
– Blow out sanding residues.
– Clean repair area with plastic cleaner → Rep. gr.52; Processing instructions – original products.
– Apply primer -A- → Rep. gr.52; Processing instructions – original products.
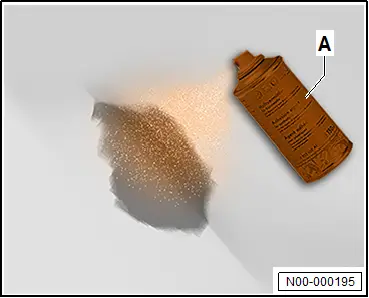
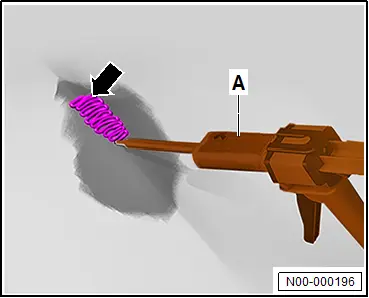
– Apply 2 cm of adhesive bead -arrow- on test piece.
– Make sure that both components of the plastic adhesive -A- are completely mixed.
– Apply plastic adhesive -A- → Rep. gr.52; Processing instructions – original products.
– Use a commercially available spatula to spread adhesive bead -arrow-.
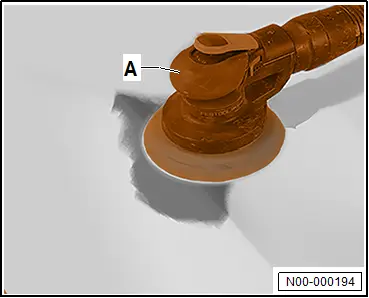
– Clean repair area with plastic cleaner → Rep. gr.52; Processing instructions – original products.
– Sand repair area with a commercially available orbital sander -A- and P150 grit sandpaper.
– Blow out sanding residues.
– Clean repair area with plastic cleaner → Rep. gr.52; Processing instructions – original products.
Welding tab
Welding tab
– → Rep. gr.52; Preparing plastic repairs.
– Clean repair area with plastic cleaner → Rep. gr.52; Processing instructions – original products.
– Use a commercially available conical milling cutter -B- to mill a V-shaped bevel on the inside and outside along the crack -1-.
– Blow out milling residues.
– Clean repair area with plastic cleaner → Rep. gr.52; Processing instructions – original products.
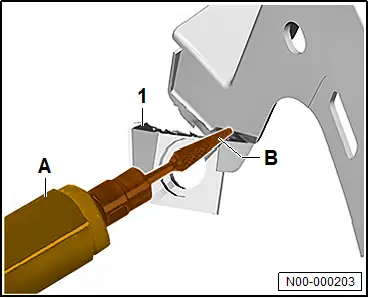
– Insert wedge-shaped welding nozzle -B- into hot air blower -A-.
– Align tab -1- flush.
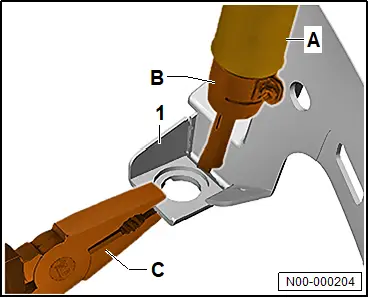
– Use wedge-shaped welding nozzle -B- and hot air blower -A- at welding temperature to spot weld tab along its entire length.
Important
● The contact line of the wedge-shaped welding nozzle -B- must be guided parallel to the surface.
● If the contact line of the wedge-shaped welding nozzle -B- is not guided parallel to the surface, material will be removed.
Note
The first welding pass is carried out without applying material to create a connecting line between the edges. The connecting line is the basis for the material application.
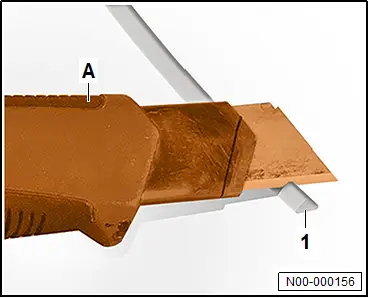
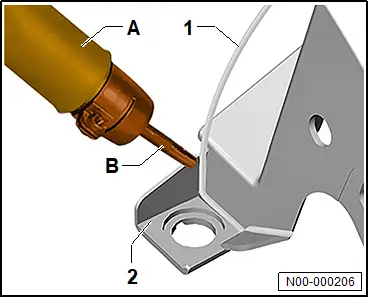
– Use a commercially available knife -A- to bevel end of welding rod -1-.
– Make sure that welding rod -1- is clean and in good condition.
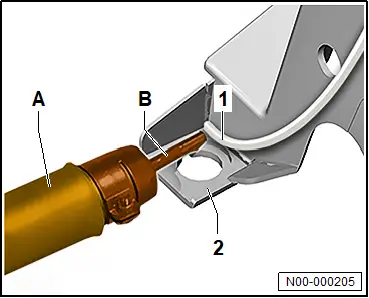
– Insert adapter nozzle for welding -B- into hot air blower -A-.
– Place welding rod -1- with bevelled side.
– Move hot air blower -A- in a wagging motion.
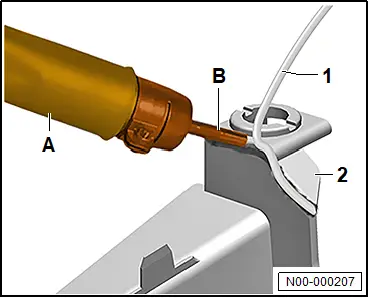
– Use hot air blower -A- to heat up welding rod -1- and tab -2- until welding rod -1- and tab -2- become soft at the same time.
– Push welding rod -1- into area of crack to apply material.
Important
● The pressure on the welding rod -1- must be sufficient such that the welding rod -1- can bond with the body attachment. The welding rod -1- must not deform or break the V-shaped bevel.
– Guide welding rod -1- vertically along the path of the crack.
Important
● Welding rod -1- must be held at an angle of 80º to 90º to the surface.
– Move hot air blower -A- along the crack.
– Select welding speed so that:
♦ the material does not decompose or deform.
♦ the welding rod -1- bonds with the body attachment.
After the crack has been welded completely:
– Allow body attachment to cool down.
– Separate excess welding rod.
Continued
– Repeat the procedure on the other side of the body attachment.
– Clean repair area with plastic cleaner → Rep. gr.52; Processing instructions – original products.
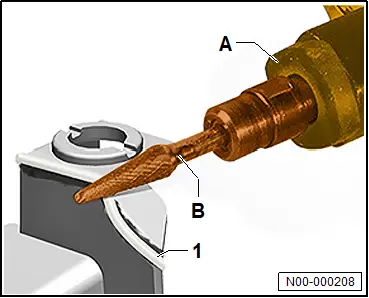
– Use a commercially available conical milling cutter -B- to remove excess material from weld seam -1-.
– Blow out sanding residues.
– Clean repair area with plastic cleaner → Rep. gr.52; Processing instructions – original products.