
Volkswagen Taos: Trim, noise insulation. Rear door trims
- Assembly overview ? rear door trim
- Removing and installing button trim
- Removing and installing rear door trim
Assembly overview ? rear door trim
Assembly overview ? rear door trim
The overview is shown for the left side of vehicle as an example.
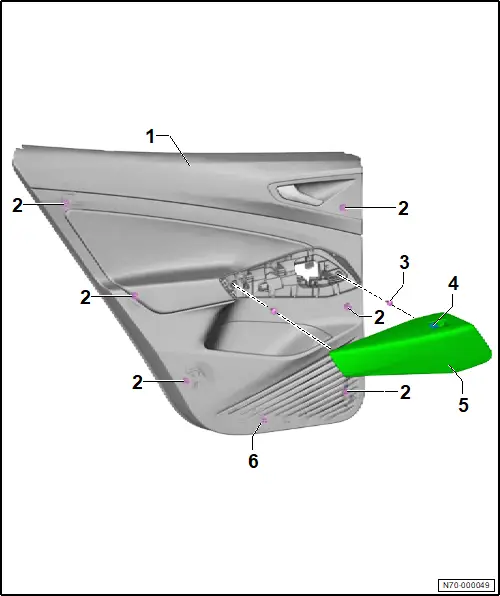
1 - Rear door trim
❏ → Rep. gr.70; Removing and installing rear door trim
2 - Clip
❏ qty. 6
3 - Bolt
❏ qty. 2
❏ 4.5 Nm
4 - Rear window regulator button
❏ Left-hand drive vehicles: with rear driver side window regulator button -E711-
❏ Right-hand drive vehicles: with rear passenger side window regulator button -E713-
❏ → Electrical system; Rep. gr.96; Controls; Removing and installing rear window regulator [E711]/[E713]
5 - Button trim
❏ → Rep. gr.70; Removing and installing button trim
6 - Rotary clip
Removing and installing button trim
Removing and installing button trim
Special tools and workshop equipment required
♦ wedge -T10383-
The rear driver side window regulator button -E711- and rear passenger side window regulator button -E713- will henceforth be referred to as “buttons”.
Removal and installation are described for the left side of vehicle as an example.
Removing
– Unclip button trim -1- together with button -2- using wedge -T10383- -3-.
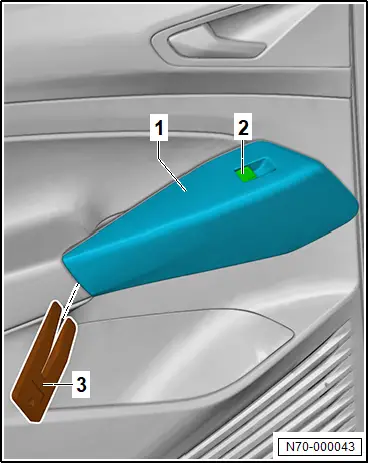
– Disconnect electrical connectors.
Installing
Install in reverse order of removal, observing the following:
– Renew any damaged securing elements.
Removing and installing rear door trim
Removing and installing rear door trim
Special tools and workshop equipment required
♦ Wedge -T10383-
Removal and installation are described for left side of vehicle as an example.
Removing
– Remove button trim → Rep. gr.70; Removing and installing button trim.
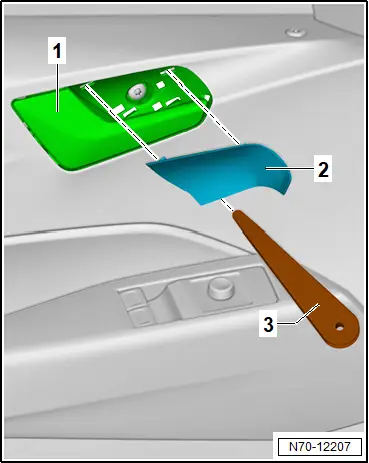
– Lever trim -2- out of interior door handle -1- using commercially available plastic wedge -3-.
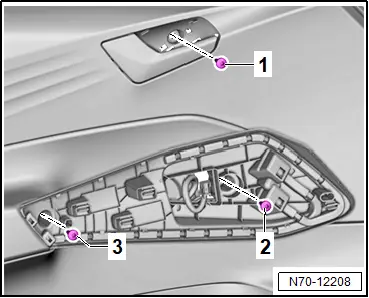
– Unscrew bolts -1-, -2- and -3-.
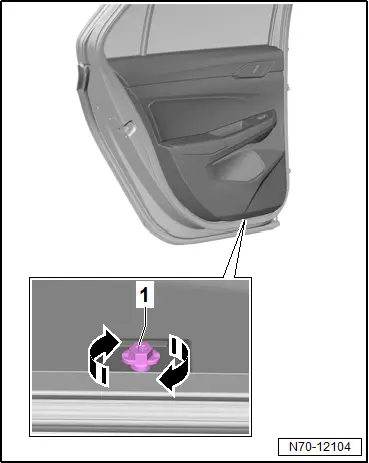
– Turn rotary clip -1- by 90° in direction of -arrow-, and release it.
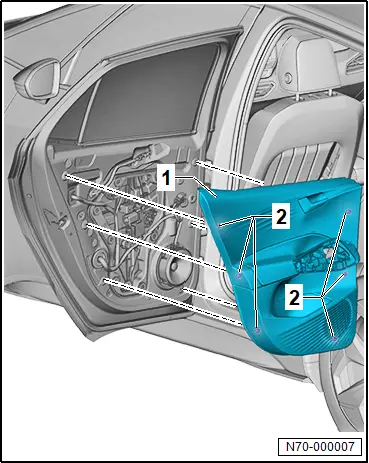
– Release clips -2- of rear door trim -1- using wedge -T10383-.
– Pull rear door trim -1- upwards out of window slot seal.
– Disconnect electrical connector.
 NOTICE
Risk of damage to the Bowden cable due to deformation.
– Do not bend or kink the Bowden cable.
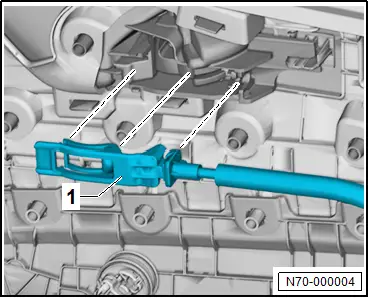
– Detach Bowden cable -1-.
Installing
Install in reverse order of removal, observing the following:
 NOTICE
Risk of damage to the locking mechanism.
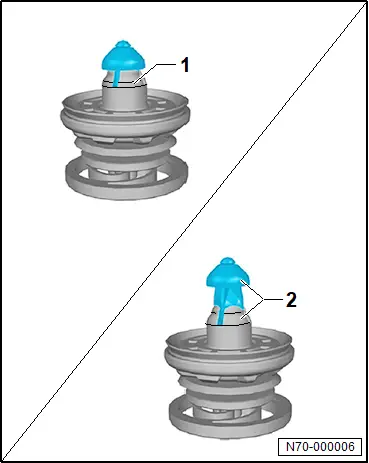
– Always turn the locking mechanism from position -2- to position -1-.
– The door trim can only be installed when the locking mechanism is in position -1-.
– Insert clips into rear door trim.
Tightening torques
♦ → Rep. gr.70; Assembly overview – rear door trim